
The hips come off the mat, the bridge looks almost finished, and there is still an urge to push a little higher. But the top of this exercise is not a contest to create the biggest arch. A useful finishing position depends on what stays supported and where the movement is coming from.
In an article published by Cleveland Clinic on August 25, 2026, physical therapist Rebecca Justen, DPT, recommends controlled hip movement rather than maximum height. The shoulder blades stay planted, and the lift should come from the hips rather than the lower back.
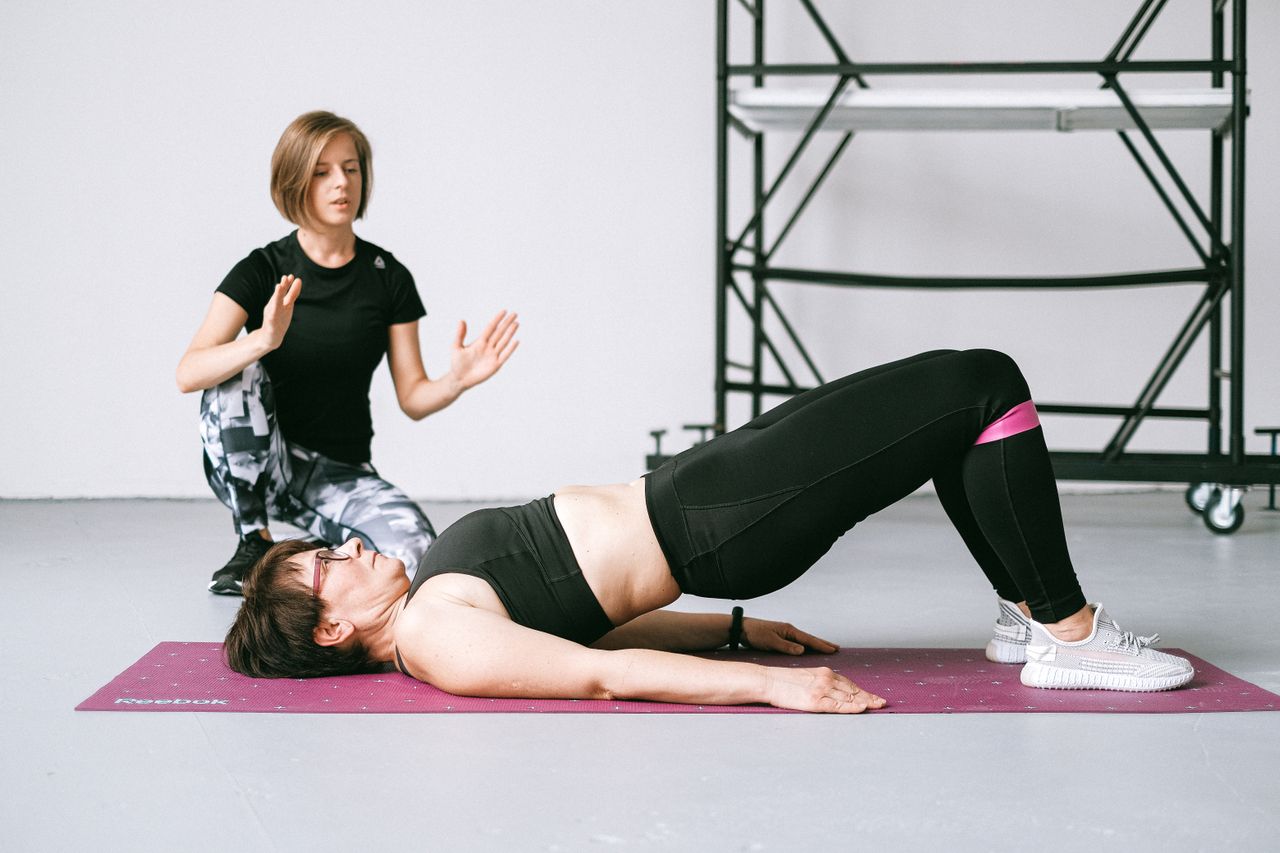
Table of contents
Find the endpoint before adding height
In Cleveland Clinic’s bridge guidance, Justen recommends a neutral spine and lifting only as high as is comfortable while maintaining form. Keeping the shoulder blades on the ground is part of that instruction, rather than something to abandon as the hips rise.
The target is a straight diagonal line through the shoulders, hips and knees. Cedars-Sinai’s bridge instructions explicitly warn that lifting the hips too high can cause the lower back to arch. More visible height therefore does not automatically mean more of the intended hip movement.
This is a position cue, not a request to flatten your lower back forcefully. Mayo Clinic’s instructions describe a neutral back that is neither arched nor pressed into the floor.
Build a repetition you can hold
Begin on your back with the knees bent. Cedars-Sinai describes feet about hip-width apart, with the feet and palms supported on the floor. Bring the heels toward the buttocks only as far as feels comfortable. Tighten the stomach and buttock muscles, then breathe out as the hips rise. Lower the hips slowly back to the floor, keeping the feet in place.
Notice the distinction between starting and finishing: the hips move off the ground, while the upper-body support stays in place. The head and upper back remain resting on the mat, with the arms beside the body.
Mayo’s basic bridge includes a brief hold for three deep breaths without losing form. That gives the top position a concrete task: maintain the alignment while continuing to breathe. Then slowly return to the starting position and repeat, rather than rushing straight into another upward push.
Our comparison of bridge and hip-thrust setups explains where the upper back is supported in each version. Here, the cue concerns the floor-supported bridge.
Keep the endpoint when adding a band
A mini-band above the knees, as in the illustration, adds another task. Justen describes gently pressing the knees outward against the band while lifting the hips. It is an optional variation; the basic bridge can be practiced without it.
Adding that outward pressure does not require a higher finishing position. Keep the same shoulder-blade support and controlled trunk position while the knees work against the band. If getting higher means the lower back starts to arch, lower the hips and re-establish the supported position before the next repetition.