Introducing a new mace workout into your current gym routine is a great way to push your body to new heights. When most people think about exercise equipment, they picture dumbbells or barbells, however, a steel mace workout offers a fantastic full-body workout. A mace workout consists of the same movement types as any other workout; pushing, pulling, and static holds. There are plenty of well-documented advantages that come with using conventional gym tools, but a steel mace workout is an awesome way to shock your body and just do something a little different.
With a mace workout, you hit every major muscle group with a range of compound and isolation exercises, effectively replacing the need for free weights. As with any new workout, it is important to start slowly and form a solid foundation and understanding of the basics. From there, introduce new movements gradually, focusing on the proper form first and foremost. In focusing on mastering the techniques of each movement, you not only get a better understanding of how each lift taxes your muscles, but you reduce the risk of injury.
A steel mace workout is effective and fun and could be exactly what you need to break through a plateau or just refresh your flagging enjoyment of exercise.
Contents
What is the best mace workout?
Below are the 12 best mace movements to help you put together a mace workout for the ages.
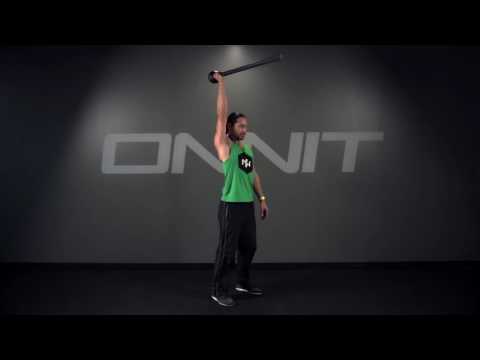
1. Overhead Press
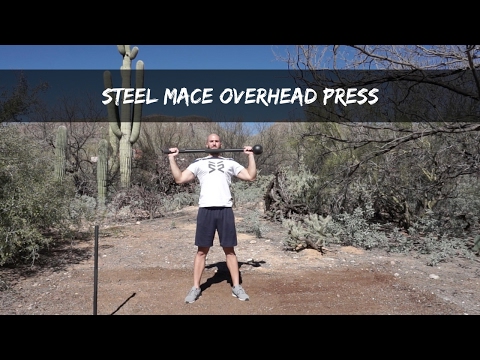
When you’re first getting started with steel mace training, it’s important to master the basics. Before you can move onto the more advanced exercises you might see on social media, you need to get comfortable doing beginner-friendly exercises like the overhead press.
The steel mace overhead press is very similar to an overhead press you’d do with a barbell. It’s fundamental to your ability to do other, more advanced exercises with correct form, so don’t skip over it.
Keep the following six steps in mind when doing a mace bell overhead press.
- Stand with your feet about hip-width apart
- Hold the steel mace with both hands, palms facing forward, at about chest level
- Inhale and pull your shoulder blades down and back
- Exhale and press the mace overhead in a straight line
- Keep your core pulled in, squeeze your glutes, and don’t let your lower back arch or ribs flare out when lifting the mace
- Inhale and lower the mace back down to the starting position
Be sure to perform this exercise on both sides (with the macehead or round end of the mace bell facing both directions). This will help you work on all sides of the body equally and avoid imbalances.
2. Front Squat

The steel mace front squat is another staple exercise you ought to master before moving on to more advanced lower body or full-body mace bell exercises. Start by holding the mace in the same position you did when setting up for the overhead press (feet hip-distance, both hands in front of the chest, palms facing forward, etc.). Then, follow the below five steps.
- Inhale, brace your core, and lower into a squat
- Keep the torso and chest lifted (don’t let the body collapse forward when lowering)
- Squat as low as you’re able while still keeping a straight back and lifting the chest
- From here, exhale and push into the floor as you rise back up to the starting position
- Be sure to perform this exercise with the round end of the steel mace facing both directions
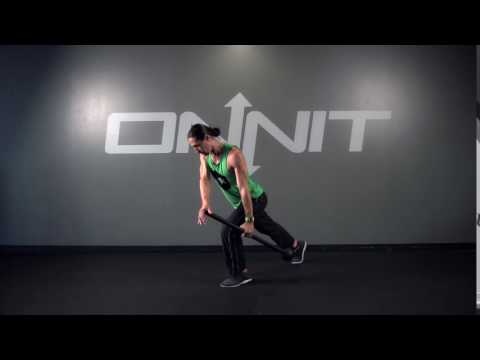
3. High Hinge Row
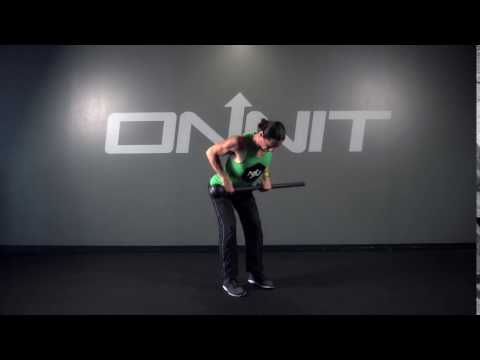
Mastering the mace bell high hinge row will help you to strengthen the upper back and arm muscles. This will come in handy when you start doing more complex mace exercises.
Keep the following five steps in mind when doing the high hinge row.
- Stand with the feet hip-width apart, holding the mace bell in both hands (palms facing toward you)
- Inhale and hinge at the hips and send them back behind you as you bend your knees and lower the mace down toward the floor (stop when it lines up with the upper or middle part of your shins)
- Brace your core, then exhale and pull the mace bell toward your torso, retracting your shoulder blades as you do so
- Inhale and return the mace to the original position
- Be sure to perform this exercise on both sides to prevent any imbalances
4. Clean
As you get comfortable with the mace bell clean, you’ll start to feel more comfortable doing other exercises that require you to generate a lot of power and move the mace quickly.
Follow the below six steps to master the clean and give your mace workout a real lift.
- Start in the same position as you would for the steel mace row (feet hip-distance, mace bell held in front of the body, palms facing you)
- Hinge at the hips slightly and bend your knees (the mace should sit just above the knees)
- Inhale and brace your core
- On an exhale, simultaneously extend (straighten) the knees and hips while pulling the mace up to shoulder height
- Rotate your elbows and flip your hands when doing this so that the palms face forward (as though you’re setting up to do an overhead press)
- Perform the steel mace clean on both sides
5. Overhead Squat

The overhead squat is a true full-body exercise and perfect for any mace workout. It targets the arms, shoulders, core, and legs all at once. This steel mace variation consequently provides several benefits and acts as a helpful addition to more targeted routines, such as core muscle workouts, that would benefit from some full-body exercises.
To perform this exercise, set up the same way you would for a front squat or overhead press, with the steel mace held in front of the chest and the palms facing forward. From here, follow the below six steps.
- Inhale and brace your core
- Then, exhale and press the mace up overhead
- Keep your core engaged and ribs pressed down and together (don’t let them flare out)
- Inhale and lower your body down into a squat, keeping the torso lifted
- When you reach the bottom of the squat, exhale, press into the ground with your feet, and rise up to a standing position once more
- Be sure to change the position of the mace halfway through to target both sides of the body equally
6. Spear Press
When you start getting comfortable holding the mace with both hands, you’ll be able to start experimenting with single-arm and single-side exercises. A good first addition to your mace workout is the spear press.
Keep the below seven instructions in mind when doing the spear press for the first time.
- Start by standing with the feet about shoulder-distance
- Hold the mace in your right hand with your hand positioned just below the macehead (the macehead should be sitting close to your shoulder with your palm facing inward)
- Inhale and draw your shoulders down and back while bracing the core
- Straighten the arm as you exhale and press the mace straight up overhead
- Don’t adjust your shoulder or pelvic position while pushing the mace up and away from you
- Inhale and return to the starting position
- Repeat on the other side
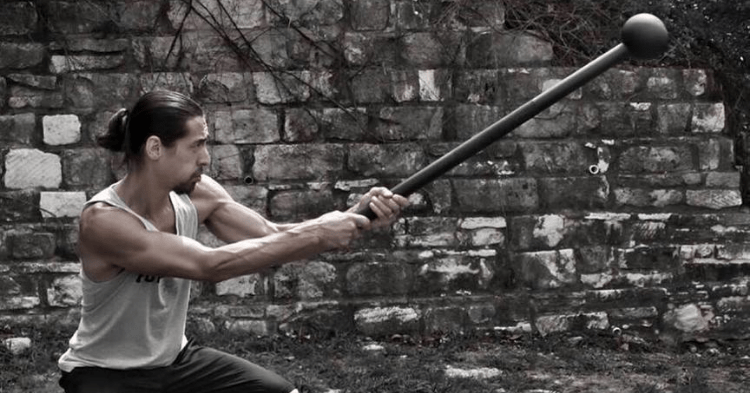
7. Side Load Reverse Lunge

The side load reverse lunge is a more challenging full-body exercise that really targets your core and lower body. Start by holding the mace as you would at the beginning of a high hinge row (feet shoulder-distance, mace held close to the body with arms straight and palms facing you). Then, follow the below six steps.
- Inhale and twist your arms so that you’re holding the mace on one side of the body, parallel to the floor
- Try not to rotate your torso (keep your chest pointing forward)
- Take a step backward, lowering into a reverse lunge
- Stop lowering when your back knee is about an inch or so away from the ground
- Exhale, push into the floor, and return to the starting position (keep the mace held on the side of the body)
- Perform this exercise with the mace held on both sides of the body
8. Split Stance Side Row
The split stance side row is another option if you’re looking for drills that will prepare you for a more advanced mace workout.
Begin in the same position that you started for the side load reverse lunge, with the mace held on one side of the body, torso pointing forward. Hold the mace so that the macehead is pointed toward the right. From here, follow the below four instructions.
- Inhale, hinge at your hips, and take a step back with your left leg, balancing on the ball of the left foot (keep the leg straight)
- Your torso should form about a 45-degree angle, and the mace should line up with your right leg
- Keep your left arm straight as you exhale and row with your right arm, bending at the elbow and pulling the mace up toward your shoulder
- Repeat this exercise on both sides, making sure to switch the direction in which the macehead is pointing
9. Mace 360

Once you’ve mastered these exercises, you should feel more confident about using the mace in unique ways. This includes rotational exercises like the mace 360, a must-master before you can move on to other, more advanced drills.
Keep the below seven steps in mind when doing the mace 360 for the first time.
- Stand with the feet hip-distance apart and holding the mace vertically in front of you
- Stack your hands and start with them close to your navel, right on top of left
- Swing the mace up over the left shoulder while keeping the ribs tucked and the elbows close the torso
- On the back part of the swing, make sure the hands are as low behind the head as possible
- When the mace reaches the opposite shoulder, use momentum to pull it over and back to the starting position (keep the ribs tucked and don’t let them flare)
- Pause for a second, then repeat
- Be sure to adjust your hand position and direction of the mace halfway through
It’s helpful for beginners to choke up on the mace when first adding this to their mace workout. This is especially useful if it feels too heavy.
10. 10-to-2

This is another staple mace bell exercise to add to your routine, especially if you’re hoping to work on your shoulder health. Below are seven steps to help you perform this mace workout move correctly.
- Stand with your feet about hip-width apart with the mace held vertically in front of you
- Stack your hands with you right on top, holding them close to your navel
- Swing your mace over your left shoulder (at your 10 o’clock)
- Keep the ribs tucked and don’t let the elbows flare
- Bring your hands low and behind your head as you swing the mace around toward the other side
- When the mace reaches your 2 o’clock position, pause for a second, then swing it back over the same shoulder and return to 10 o’clock once more
- Be sure to perform this exercise in the opposite direction as well, moving from 2-to-10
11. Joust with Lunge
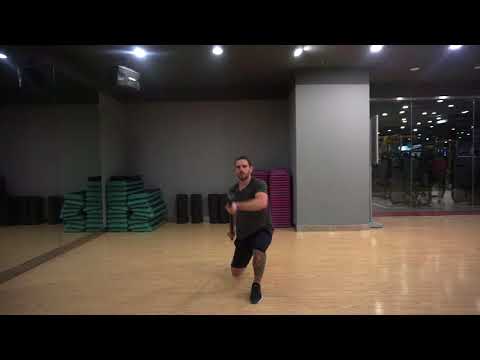
The joust with lunge is similar to the side load reverse lunge, except you’ll be taking a step forward instead of backward.
Start by holding the mace in a side-loaded position on the right side. Make sure the palm of the hand closest to the macehead is facing up, while the palm of the other hand is facing down. Then, follow the below five steps.
- Take a big step forward with your left foot as you inhale
- Keep your back straight and torso perpendicular to the forward
- Joust the mace forward (press it forward as though you’re a swordfighter)
- Exhale and press into the front foot as you return to the starting position
- Be sure to perform this exercise on both sides
12. Single-Arm 360
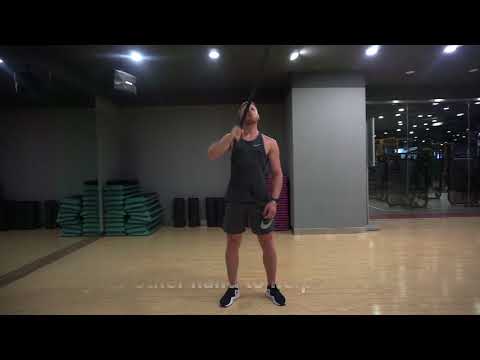
When you’ve mastered some of these more advanced two-arm mace exercises, it’ll be time to move on to single-arm options, including the single-arm 360. This exercise is great for leveling up your shoulder health, as well as your single-arm strength and mobility.
Below are five steps to help you with this exercise.
- Begin as you would for the two-arm steel mace 360, with feet hip-distance apart, mace held vertically, hands stacked on top of each other at the navel
- Remove your top hand while keeping the mace centered vertically
- Swing the mace up over your shoulder, keeping the ribs pulled together and the core drawn in
- When the mace reaches the opposite shoulder, use momentum to swing it over and return to the starting position
- Perform this exercise with both hands
Change Up Your Routing With a Body Sculpting Mace Workout
Introducing a mace workout into your current gym routine is a fun and satisfying way to tone your body. Besides, who wouldn’t want to spend some time swinging a giant mace, calling it a workout? Much like any other gym venture, when starting a mace workout, begin slowly, and set a solid foundation for yourself.
You don’t need to make a mace workout the only thing you do. Variety is the spice of life and also keeps your body from plateauing. Once introduced, a mace workout makes a great addition to your normal routine. Change things up from time to time, different focuses, different intensity and exercises. A mace workout is just another tool to add to your workout knowledge base, to keep things interesting and make sue the gains keep rolling.